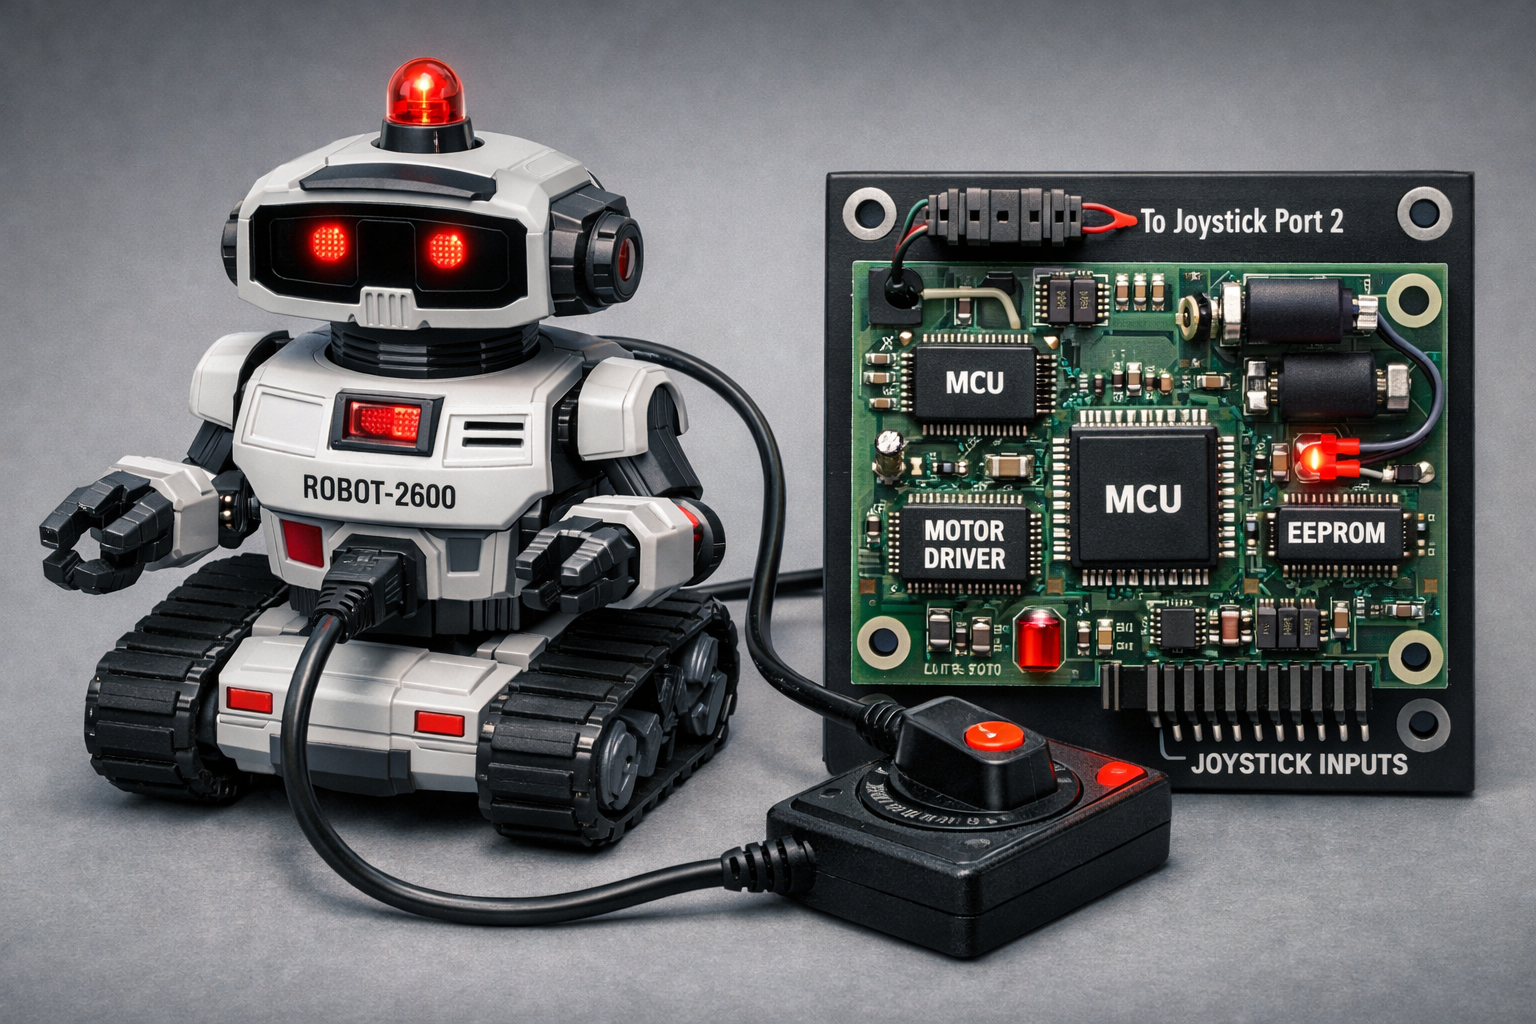
ROBOT PROJECT/ATARI 2600+
 This idea is awesome — pure “1980s homebrew” style!
Here’s a basic design concept, made specifically for the Atari 2600+/Retron and joystick control.
1. General Concept
- Joystick 1: used as the “control panel” and “programmer.”
- Joystick Port 2: connected to the robot through a special cable.
- Robot: contains a small electronic board that
- reads signals coming from joystick port 2,
- interprets them as manual commands or as “code” to be stored.
2. Signals Available on the Joystick Port
The Atari joystick port provides simple digital lines:
- Up, Down, Left, Right, Fire → 5 logic lines (plus ground and +5V).
- From the robot’s perspective, these lines act as 5 digital inputs that your game can “turn on/off” by sending patterns.
3. Robot Architecture
Inside the robot you could have:
- A simple microcontroller (like a low-cost PIC/AVR/ARM), powered by the port’s +5V (if sufficient) or by an internal battery.
- Motor drivers (H-bridges) for:
- Left motor (left wheel/tread),
- Right motor (right wheel/tread),
- optional servos for head or sensors.
- Joystick interface:
- digital inputs connected to the Up/Down/Left/Right/Fire lines,
- optional protection (resistors, optoisolators for a cleaner design).
4. “Direct Remote Control” Mode
In this mode, the robot responds in real time to signals:
- Up → move forward (both motors forward).
- Down → move backward.
- Left → turn left (right motor forward, left motor stopped or reversed).
- Right → turn right.
- Fire → special action (e.g., raise an arm, light an LED, change mode).
The game on the Atari 2600/Retron simply reads joystick 1 and “copies” its state to port 2 (via logic in the game code using the console’s I/O registers).
5. “Programming” Mode
Here’s the fun part — using the joystick as a “language.”
- Basic idea: each direction or combination represents an instruction or a nibble/bit.
- Simple example:
- Up = “short forward”
- Down = “short backward”
- Left = “turn left”
- Right = “turn right”
- Fire = “end program” or “confirm”
- The game sends a sequence of commands (as if you were manually driving the robot), but in “record” mode the robot doesn’t execute them immediately — it stores them in a small internal EEPROM/flash.
- When you press a special combination (e.g., Fire held for 2 seconds), the robot switches to “playback” mode and autonomously executes the stored sequence.
6. How to Program It from the Atari 2600+/Retron
- On the 2600, you write a homebrew game that:
- reads joystick 1,
- displays a visual representation of commands (timeline, step list),
- when confirmed, sends the sequence to the robot through joystick port 2, encoding each step as a pattern of signals (e.g., fixed-duration pulses).
- On the robot, the microcontroller:
- samples the port lines,
- recognizes the patterns (like a small “serial protocol” made of Up/Down/Left/Right signals),
- saves them in memory.
In short: your game is the editor, and the robot is the executor.
The program i have built from scratch is a command interface for an ATARI 2600+ robot up down left right and push button command make go fantasy robot directions and move the arms(body part of the robot NOT WEAPONS) or light up led for now make only sounds.
I hope you like my progject and build it for real!
This Software is free and is shared Under GNU Linux License:
read here for more information
Licenze - Progetto GNU - Free Software Foundation
Download
Leave a comment
Log in with itch.io to leave a comment.